

I love frying falafel lot! And so, my kitchen was my playground as I experimented with approximately 10 lbs of falafel mixture. I wanted to answer:
Almost 200 falafel later, I have answers to these and other questions I didn’t even know I had.
This one is easy! Garbanzo beans quickly revealed themselves as the superior bean not only regarding texture, but also workload and flavor. Fava beans yield similarly soft falafel as long as you commit to one of two forms of tedium:
I also find unsimmered fava beans retain their raw - AKA grassy and beany - flavor even after frying or baking them. It’s not entirely unpleasant! However, it does override the more subtle grassiness of the fresh parsley.
Baking soda upleveled my falafel in unpredictable ways! No, it did not make processing easier. It likewise had no effect on shaping or frying.

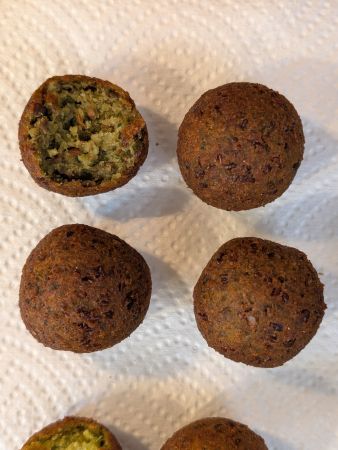
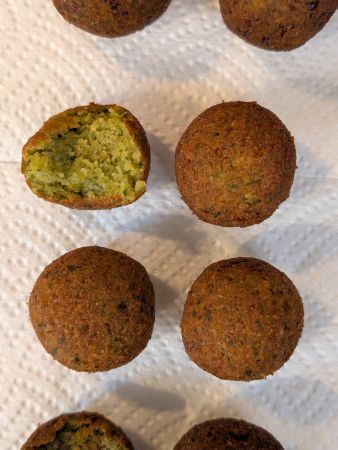
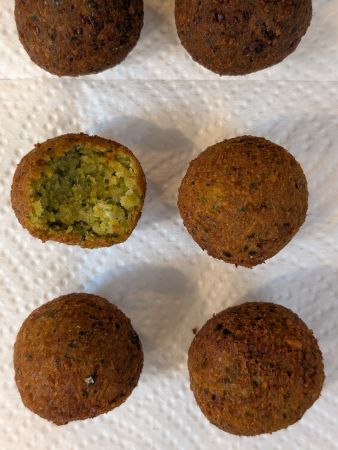
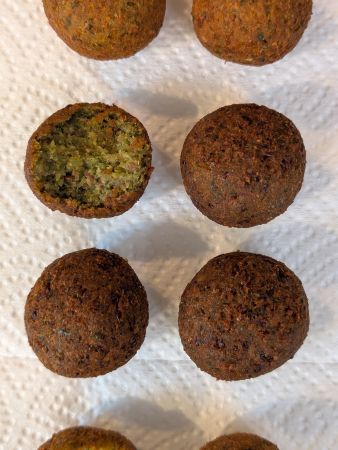
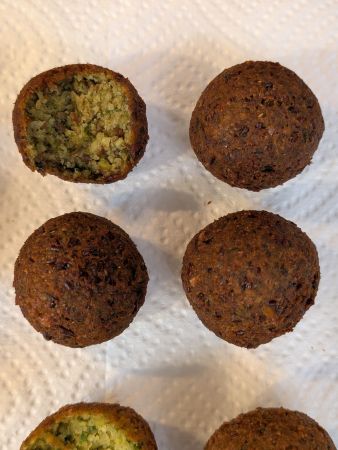
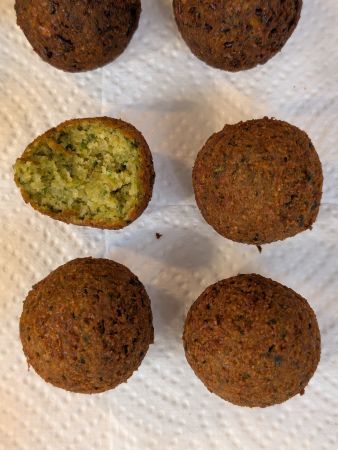
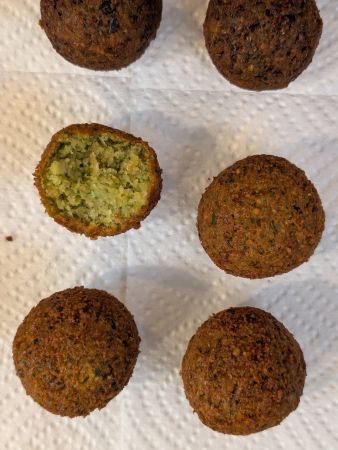
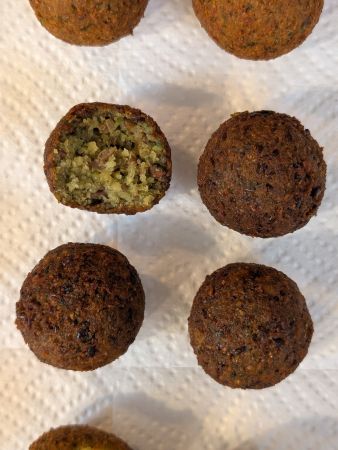
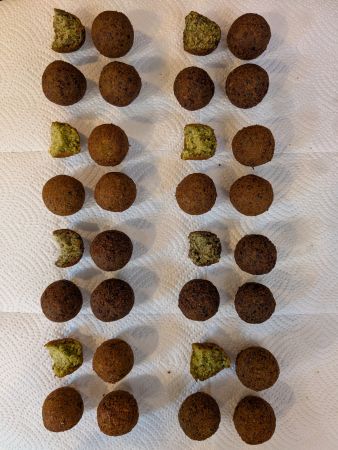
In fact, the differences between 100 falafel made with alkalized water-soaked beans and those made with pure water-soaked beans were neither immediate nor obvious. As I fried batch after batch, however, I noticed more color development in the former. They were demonstrating the pretzel effect!
Yet more surprisingly (though just as logically), the insides of these falafel were slightly greener. Acid dulls green produce, and since baking soda raises pH, it protected the vibrancy of my fresh herbs.
After discovering that baking soda has little impact on processing, I wondered if it contributed to greater lift. It does! But this contribution is minor, and almost indetectable when falafel are warm.
I almost called baking soda optional until I noticed a small increase in lift translates to more pleasant falafel when cool. Falafel are best made to order and enjoyed fresh. They toughen as their temperature drops, and for some, this can be the difference between eating or tossing leftovers. Falafel with baking soda didn’t need as much reviving even after a full 24 hours from frying!
It will not! I was compelled to explore this question following a short by America’s Test Kitchen which proves pancake batter refrigerated overnight produces comparably fluffy pancakes. Indeed, you can ride the power of your food processor and add your (double-acting) baking powder with everything else.
Admittedly, I’m diverging from traditional recipes with this advice. Middle Eastern food bloggers including Suzy Karadsheh of The Mediterranean Dish and Yumna Jawad of Feel Good Foodie instruct their audiences to add baking powder later. You may follow their lead! I’m personally choosing the assurance of my appliance that everything is uniformly mixed.
I didn’t start these experiments wondering if a pound (454 grams) of soaked beans, an onion, half a dozen garlic cloves, a literal bunch of herbs, and a figurative bunch of spices would challenge my 13-cup (3-Liter) Cuisinart food processor. So many recipes list similar quantities, I didn’t even consider they would be too much!
Yet if machines could cry, mine might’ve the first time I loaded it for these tests. I have a thing - You could call it hatred - of using half of anything in a recipe: half a bag of beans, half an onion, half a bunch of herbs... I will write these measurements if I must, but practically speaking, I simply don’t like forcing cooks to solve random bits of produce.
I must. I decided to write this recipe for one batch that a decent home food processor can handle. Besides, it already makes about two dozen falafel! You may double it to avoid all those halves if you'd like, but be prepared to process twice and shape nearly 50 times.
Double at your own risk! The measurements below amount to what a decent home food processor can handle in a single batch. (I tested with an older model of this 13-cup/3-L Cuisinart.)
makes about 2 dozen falafel, approximately 2 Tbsp (30 mL/25 g) each
In a med to lg pot, dissolve baking soda in 1 qt (1 L/kg) water.
Remove any dead or false beans, then add to pot. Soak at room temperature 18-24 hrs.
Toward the end of soaking time, prepare fresh produce:
Drain and rinse beans. Add to food processor, then pulse about 10 times until uniformly minced.
Remove food processor top and scrape sides. Add fresh produce, then again, pulse about 10 times. Repeat with seasonings and leavening.
Run motor for approximately 5, 30-sec bursts scraping sides in between. Stop when mixture resembles drop cookie dough with evenly sized and distributed bits of parsley (and other herbs if using).
Store mixture in an airtight container and refrigerate at least 1 hr, or up to 2 days.
When ready to fry, preheat oil to 350°F/180°C and line a baking sheet with a double layer of paper towels.
Meanwhile, portion and roll mixture into balls roughly 2 Tbsp (30 mL/25 g) each.

Fry falafel no more than 8 at a time for 4-6 minutes per batch. Transfer to prepared baking sheet (from Step 8) and enjoy as soon as possible.
For those preferring to bake without oil, preheat oven to 375°F/190°C and line 1-2 baking sheet(s) with silicone or parchment. Portion and shape mixture into patties about 2 Tbsp (30 mL/25 g), 1 ½ in (4 cm) wide each. Bake half the falafel for 15 min, then flip and bake another 10-15 until golden. Repeat with the other half.
Stuff them into pita with some fresh produce, creamy hummus, and dairy-free yogurt!
The life of your falafel mixture hinges upon the freshness of your produce. Chances are, however, it will last at least 3 days from the start of Step 7.
I've heard you can shape and freeze falafel/balls patties, but I have not tested this method myself. If you choose to explore this option, I advise frying no more than 6 at a time to avoid lowering the oil temperature too much.
And baking frozen falafel mixture begs a new set of tests! Should you raise the temperature and/or extend their cooking time, or simply thaw them before proceeding? I don't know...yet 😉

Kale yes, I'm soy excited you're here! My name is Christi, and sharing food brings me even more happiness than puns.
Does It Vegan? is a question for conventional recipes as well as an answer for my career. Because no matter what else I've been, I've been a plant-based cook who thrives on connecting with people through their favorite foods.
Gratitude is the most scrumptious seasoning!
Thank You ♥
From the Bottom of My Hearth, Christi of Does It Vegan?


