

I'm still floored by how much I learned from a few vegan royal icing recipes. While my own recipe would classify as easy, every ingredient and technique has a scientifically observable explanation.
To avoid being cloyingly sweet, royal icing benefits from a little salt. A pinch of finely ground table salt is effective, but coarser salts like kosher salt may create random salty bite bombs.
The salt in salted garbanzo beans has already been dissolved preventing such saline surprises. Additionally, since companies include salt for structural integrity more than taste, they employ modest amounts; no brand I've encountered will make your icing salty.
Basic royal icing essentially has no flavor, only sweet taste. Any flavor comes from extracts. Clear (AKA artificial) vanilla extract has a place in my kitchen, but it isn’t in royal icing. When serving as the sole flavor agent, the fakeness of this ingredient is offensive to me.
I pitted violet against white gel food coloring amidst my vegan royal icing recipe review. After a thorough comparison, I adamantly recommend a small drop of violet to my basic formula.
To recap, yellow and violet are are opposites on the color wheel. In proper ratios, according to color theory, these hues (and other complementary pairs) neutralize each other. A smidge of violet thus restores brightness after pure vanilla extract imparts a yellow tint.
Most shockingly, pure vanilla extract and a droplet of violet produces a whiter icing than clear vanilla extract and a tablespoon (45 mL) of white! So much white, moreover, demands twice as much food coloring to transform into bold colors: one dollop to reach the pastel stage, and another to transcend it.
Violet, therefore, unlocks not only superior flavor, but also an opportunity to stretch ingredients. And since the whitening agent in white gel food coloring is chalky titanium dioxide, dyed-white icing sports a matte finish once dried.
I feel annoyed by royal icing recipes that call for a 1-lb (454-g) box of powdered sugar, then instruct to adjust thickness with more powdered sugar. I just used it all! Consequently, my recipe is about ¼ cup (68 mL/34 g) shy of a standard box leaving a buffer to create stiffer consistencies.
As I tested various vegan royal icing formulae, I frequently wished for an attachment between my whisk and paddle. I wanted the wires of the former to incorporate air, but the inflexibility of the latter to push through thick recipes. Such are the beaters of a hand mixer!
A hand mixer is also the goldilocks appliance for ease of use. Unless you have a tilt-head stand mixer, attachments are significant obstacles to adding dry ingredients in stages. A hand mixer, by contrast, can be unceremoniously moved aside.
It empowers scaling too! As stand mixer attachments often hover just above the bottom of the mixing bowl, simply halving a recipe that uses one may not be possible. (There may not be enough ingredients to reach!) A hand mixer can be maneuvered for thorough mixing. Plus, being handheld, it enables you to feel as well as see how thick your royal icing has become.
I’ve tried both approaches, and honestly, sifting powdered sugar makes no discernable difference for royal icing. I wouldn't even dream of not sifting it for macarons! Yet in this application, you're safe to skip such an aggravatingly dusty task.
Bubbles are proof of a structural network. "Whip until foamy," is an observable way to say, "Whip until a protein network has been established."
A protein network from whipped egg whites or aquafaba translates into shiny royal icing. Though functionally similar, these ingredients differ in protein content with egg whites boasting about six times more! Conventional royal icing thus retains shine if thinned with water or lemon juice; its vegan counterpart, however, becomes dull.
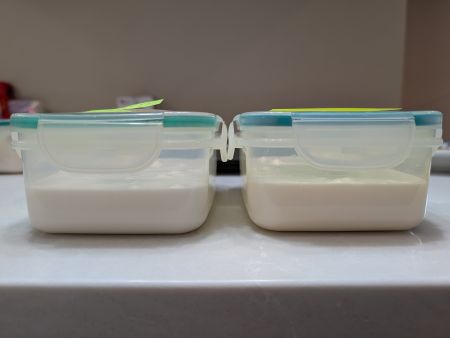
Consequently, I beat all the aquafaba in a 15-oz (425-g) can of salted garbanzo beans until foamy. Some of this foam goes into my master recipe while some remains reserved, activated and ready to thin the royal icing as needed.

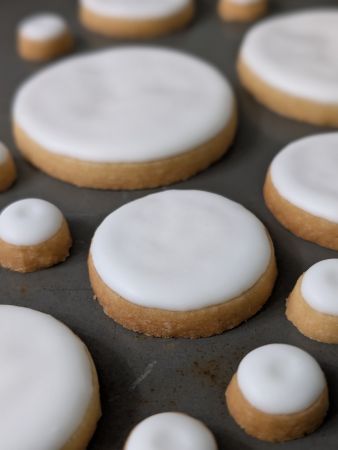
The most intimidating aspect of royal icing recipes may be when they say to adjust to the “desired consistency”. To know the desired consistency is to know the undesired consistency…
but if you've never made it, you don't have this basis of comparison!
Meggan Leal of Cooking on Caffeine brilliantly explains consistencies in one of her supplementary videos. Though I admittedly continue to overanalyze the viscosity of my icing, this resource mercifully reduced how much time I spend fine-tuning it.
I’m not against using zip-top bags for piping, yet you need to know how to employ this hack correctly.

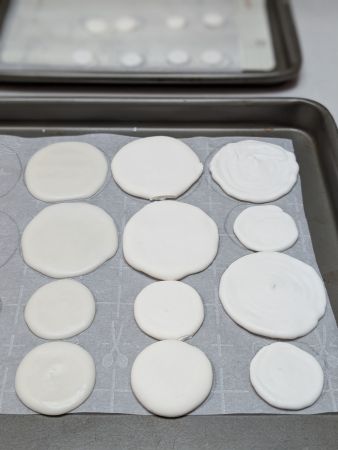
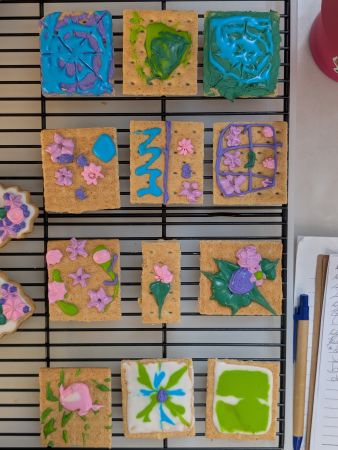
Firstly, zip-top bags are not for details. But if you’re planning a seamless outline and flood with a single color (like my heart cookies), then they can be your friends!
Just use quart/L freezer bags. The height of gallon/4 L bags makes them difficult to fill. Moreover, substantial head space can flop over and obstruct your sightline during piping. I stress “freezer”, meanwhile, for their stronger plastic; regular zip-top storage bags are flimsier and bound to burst when squeezed.
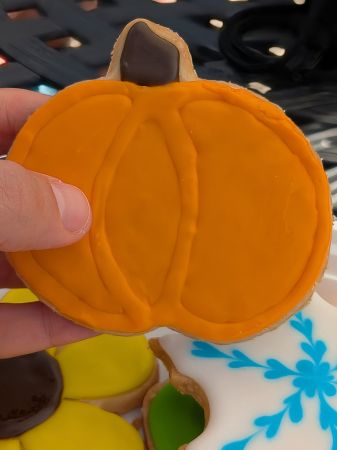
Lastly, and perhaps most critically, fine lines require piping tips. My pumpkin cookies were piped without a tip, and despite not being my worst work, they’re not my best either.
Piping tips, in turn, require piping bags. Even sturdier freezer bags will weaken and tear when forced to hold a tip.
Prior to researching it, I thought royal icing was completely self-leveling. Yet flooding almost always needs encouragement from a toothpick or skewer. Checkout this brief video on decorating with Erin Jeanne McDowell of "Bake It Up a Notch" (a Food52 YouTube Series), "How to Make and Use Royal Icing | Bite Size".
I cannot assess your environment and needs from afar. If you’re in a dry space making single-color cookies for yourself, why wait for your icing to harden at all? But if you’re in a humid area piping multicolored designs to be shipped, wait at least a few minutes before adding the next hue and 1-2 days before packing.
I’m familiar with a couple ways to catalyze hardening time, but in full transparency, I haven’t tried them myself:
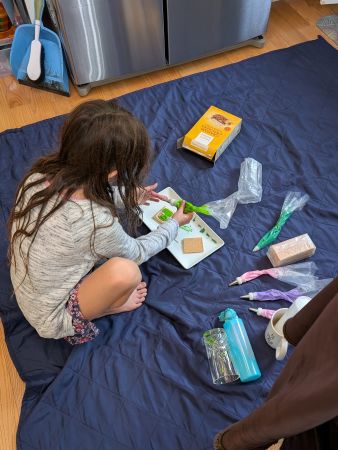
My youngest and I certainly did.


Do you have to read my post? No, unless you're tempted to change something. While this would classify as an easy recipe, every ingredient and technique herein has a scientifically observable explanation.
makes about 4 c (960 mL), enough to cover 2 dozen large cookies
Procure 2 lg bowls and a med bowl. Into one lg bowl, strain all the aquafaba; the other, add extract(s) and food coloring (if using). Measure powdered sugar into med bowl.
With a hand mixer on hi, whip aquafaba 1-2 min, until foamy. Transfer about ½ cup (130 mL/65 g) to bowl of extract(s and food coloring). Whip again briefly, just to combine.
Add approximately ⅓ of the powdered sugar to aquafaba mixture, then beat on lo. Repeat twice, until all sugar has been added in a total of 3 installments.
Beat on hi about 30 sec, until smooth. Turn off motor. Stand beaters perpendicular in bowl, then lift and begin counting seconds until their imprint disappears.
Incorporate more whipped aquafaba (from Step 2) or leftover powdered sugar to adjust consistency if necessary. Color and pipe as desired.
My favorite resources for consistency and decorating currently are:
As for those chickpeas, I suggest:
But most importantly, got cookies?!

Kale yes, I'm soy excited you're here! My name is Christi, and sharing food brings me even more happiness than puns.
Does It Vegan? is a question for conventional recipes as well as an answer for my career. Because no matter what else I've been, I've been a plant-based cook who thrives on connecting with people through their favorite foods.
Gratitude is the most scrumptious seasoning!
Thank You ♥
From the Bottom of My Hearth, Christi of Does It Vegan?


